Document Workflow & Approvals
Learn about document workflows (contract life-cycle management) modeling including document approvals.
 25 min | 9 Tasks
Task 6 Create Additional Flows
Right now, all the Stages and Approvals in your Workflow are ready, but your current Workflow design only permits users to move documents forward through the workflow. Rarely is a document’s lifecycle so straightforward. Documents often may circulate repeatedly between two or three stages. Now we will make this Workflow a bit more realistic by adding routing options.
Step-by-Step Guide
Step 1: Connect a Flow Back to the “Draft” Stage
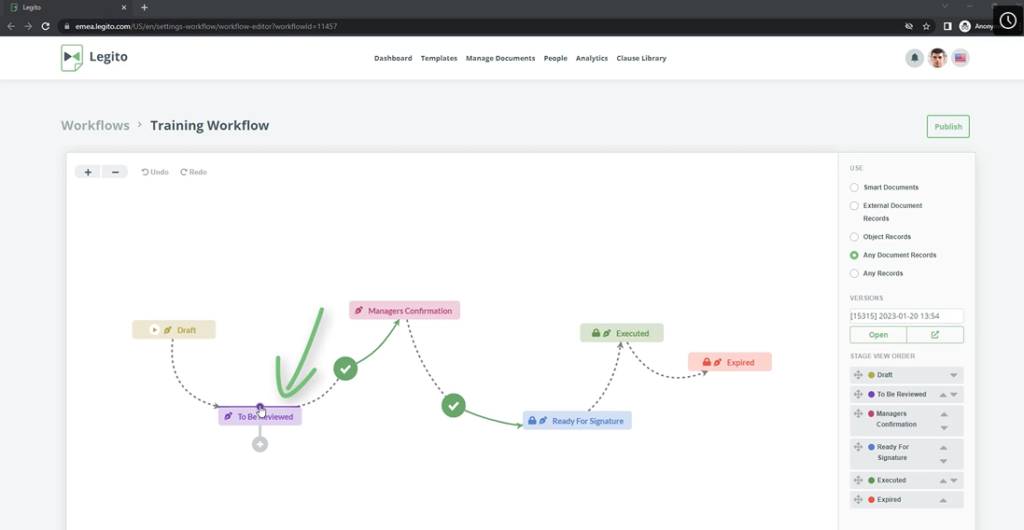
First, we will connect a Flow back to the “Draft” Stage. Place the cursor over the top border of the “To Be Reviewed” Stage. A line with a dot in the middle will appear. Click and hold this dot, and drag the dotted line back to the “Draft” Stage.
Note:
Before this change, users were limited to only moving a document from the “Draft” to the “To Be Reviewed” Stage, but could not move it back to Draft. The newly added Flow now permits users to move a document back to the “Draft” Stage from the “To Be Reviewed” Stage.

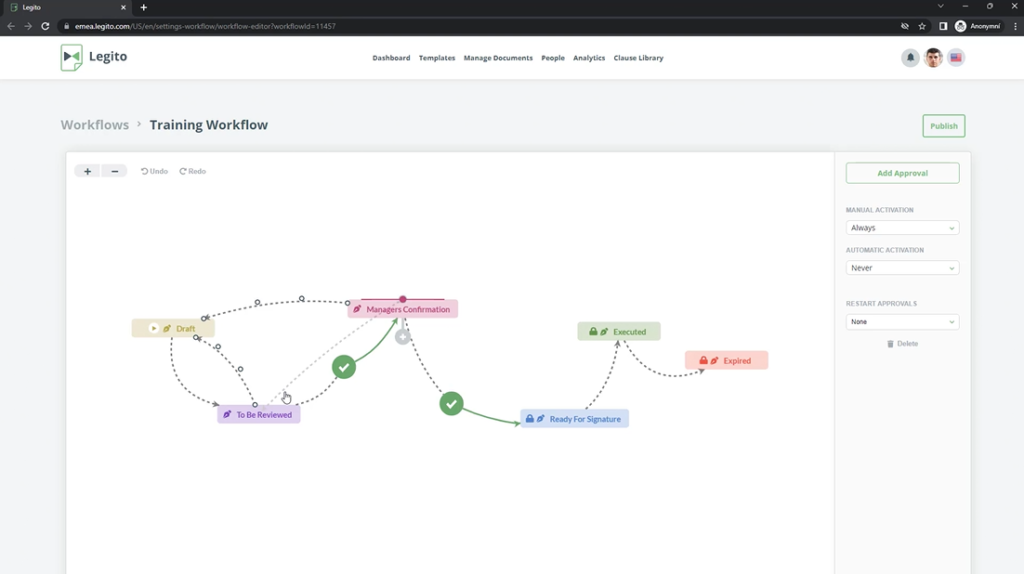
Step 2: Create Further Flows
Now, following the same process as above, drag 2 separate Flows from the “Manager Confirmation” Stage to the “Draft” and “To Be Reviewed” Stages.
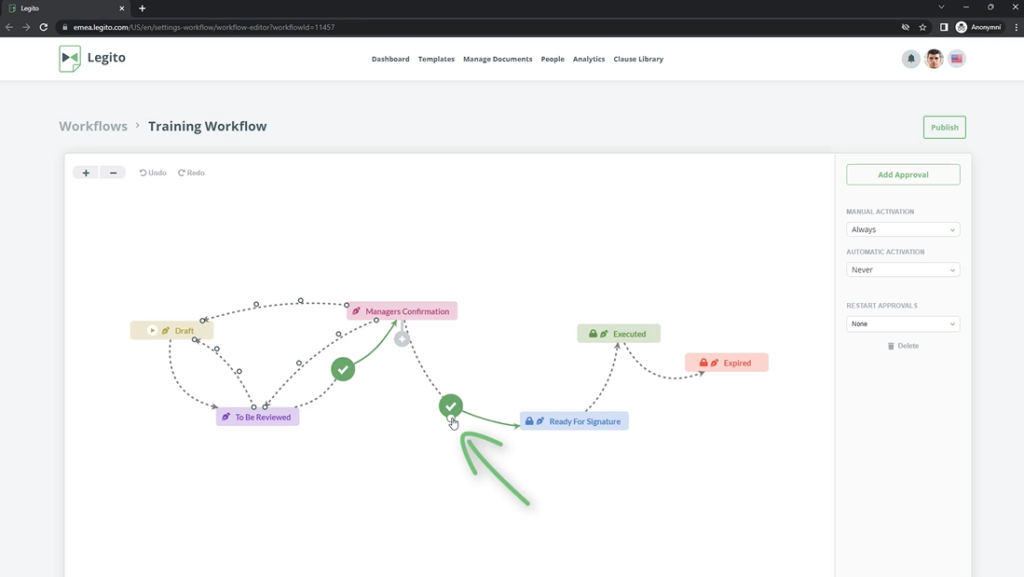
Step 3: Draw Flow from Approval
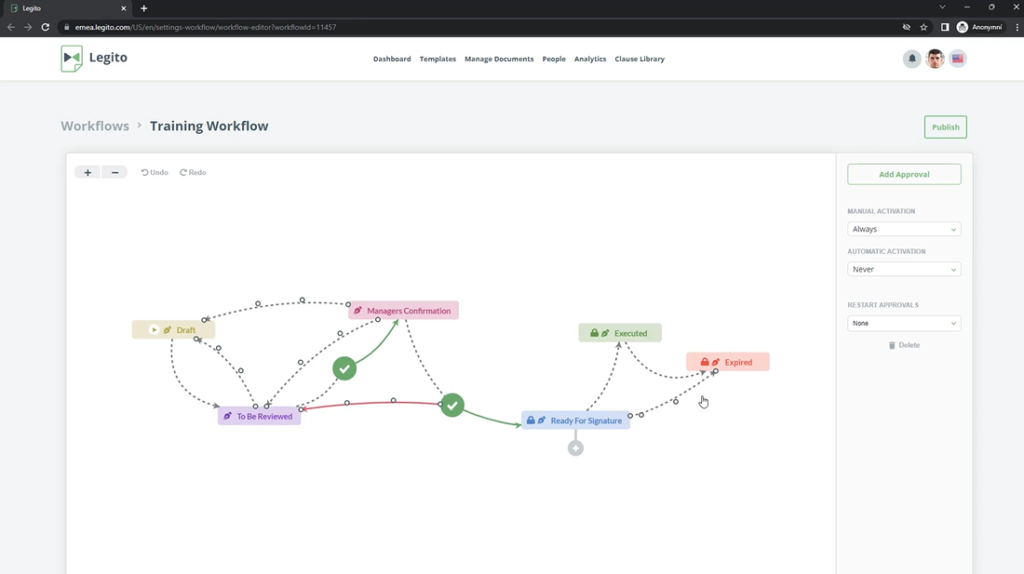
Flows can also be drawn from Approvals. You can do this by placing the cursor at the bottom border of the second Approval (between the “Manager Confirmation” and “Ready For Signature” Stages) and dragging the Flow to the “To Be Reviewed” Stage.
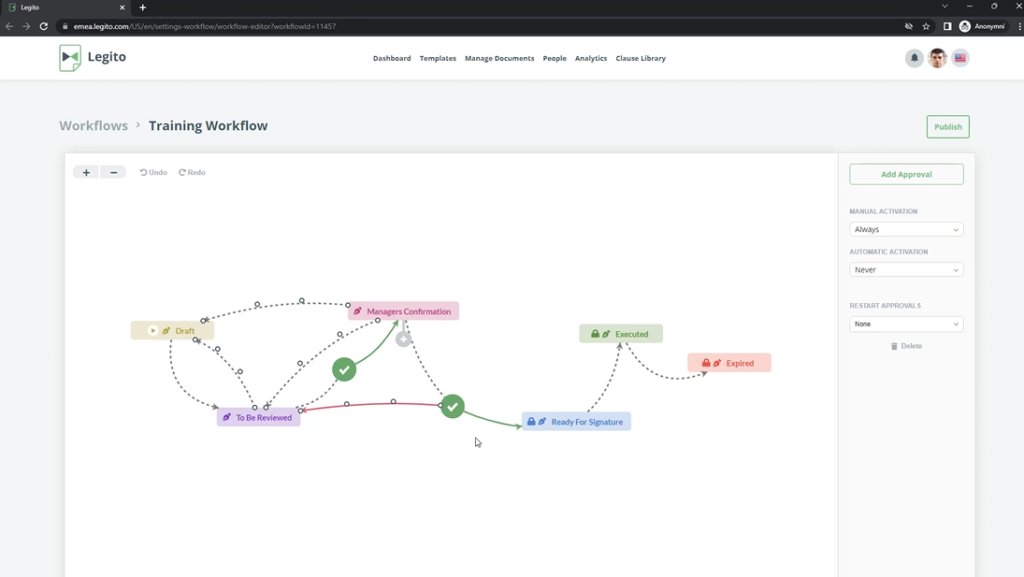
You should see one green and one red Flow from the Approval. It means that the document will be routed depending on whether the document was approved or rejected.
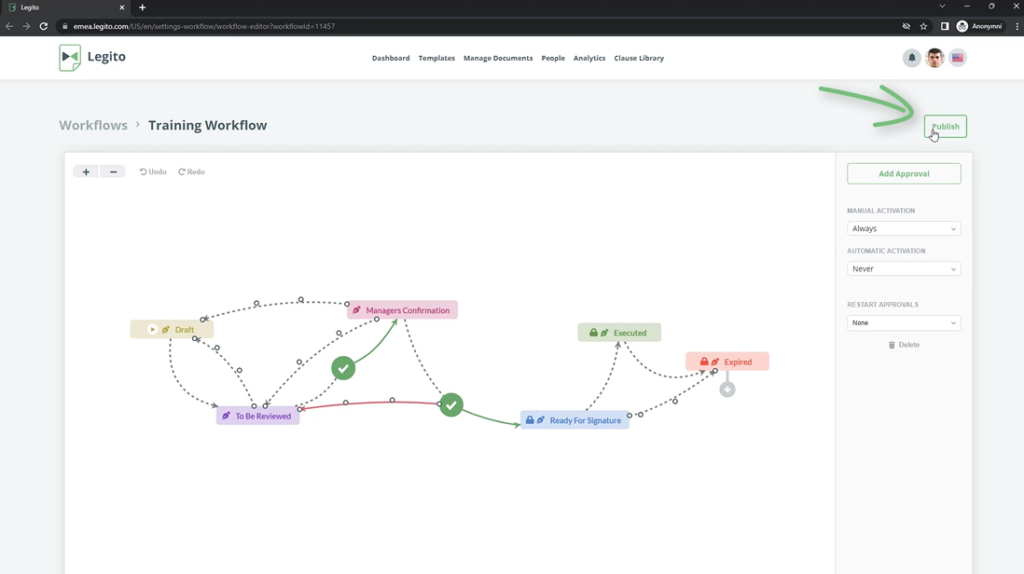
Step 4: Publish the Workflow
The final step in this task is to draw a Flow from the “Ready For Signature” Stage to the “Expired” Stage.
This training Workflow is now complete. Click the Publish button in the top right corner to publish the Workflow, making it ready for use.